Since, Linux based machines contribute 96% of the total public internet, it is no doubt that Linux is the most successful kernel ever build for web related tasks. As most of you know that
Around 50% of whole internet is running with Apache web services. So the combination of “Linux + Apache” is inevitable in internet. In this post, we will see the installation of
Linux + Apache + Mysql + PHP (commonly called as LAMP).
Linux based operating systems comes under a variety of flavors/distributions. Since it is open source, any programmer can customize it as per their requirements. There are 2 very popular and commonly used distributions which we are going to see here.
- Ubuntu — Debian based arch
- CentOS — Redhat based arch
I will share you the step by step instruction to install Apache + Mysql + PHP in these distributions in detail below.
- LAMP installation on Ubuntu with a single command:
Single Command Installation:
============================
Let me consider you have a freshly installed Ubuntu machine with root access with you and if you want a trouble free and one step installation for LAMP. You can follow the below step.
This will install Apache, Mysql and PHP in a single command.
Just ssh the server and type the following command. Make sure you are using ^ symbol at the end of lamp-server.
[dropshadowbox align=”none” effect=”lifted-both” width=”auto” height=”” background_color=”#ffffff” border_width=”1″ border_color=”#dddddd” ]apt-get install lamp-server^ -y[/dropshadowbox]
You can refer the below screen capture for details.
In case, if your server were unable to pull up the repository for lamp server, you can try updating your repository and try the above command again.
Just type the following command in the terminal to update.
[dropshadowbox align=”none” effect=”lifted-both” width=”auto” height=”” background_color=”#ffffff” border_width=”1″ border_color=”#dddddd” ]apt-get update[/dropshadowbox]
You can refer the below screen capture for details.
- Installing LAMP separately one by one:
######################################
If you want to install custom versions of LAMP or prefer to go to step by step process, you can follow the below steps.
To get a successful LAMP, you have to install the services in the following order,
- Apache
- MySQL
- PHP
As like the name states, Linux, Apache, MySQL and PHP give LAMP.
APACHE:
To install Apache, type the following command in your server terminal.
[dropshadowbox align=”none” effect=”lifted-both” width=”auto” height=”” background_color=”#ffffff” border_width=”1″ border_color=”#dddddd” ] apt-get install apache2 -y[/dropshadowbox]
You can refer the below screen capture for details.
MYSQL:
To install MySQL type the following command in your server terminal.
[dropshadowbox align=”none” effect=”lifted-both” width=”auto” height=”” background_color=”#ffffff” border_width=”1″ border_color=”#dddddd” ]apt-get install mysql-server[/dropshadowbox]
You can refer the below screen capture for details.
PHP:
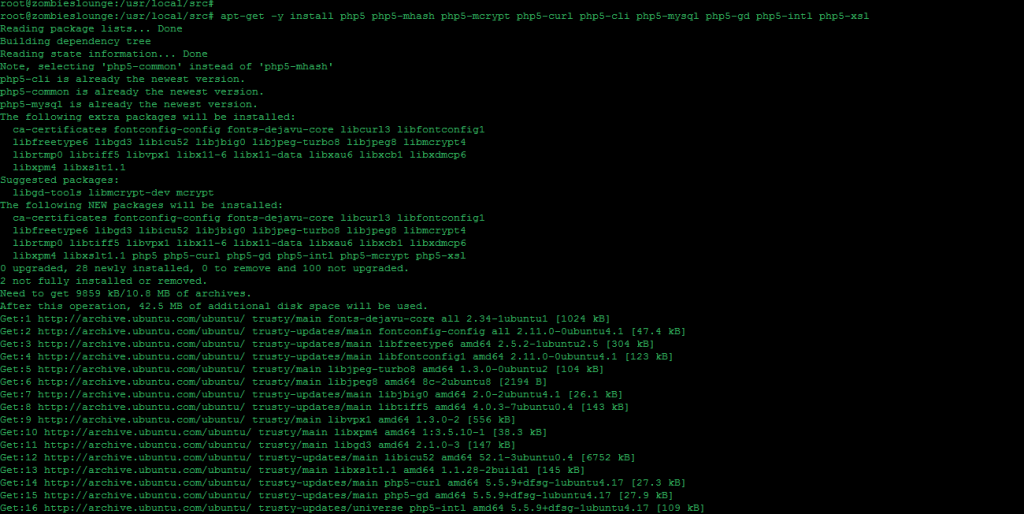
You can install PHP along with all necessary modules in a single command. In this case, we are installing PHP 5.5 version along with all necessary modules for a web server.
Type the following command in your terminal
[dropshadowbox align=”none” effect=”lifted-both” width=”auto” height=”” background_color=”#ffffff” border_width=”1″ border_color=”#dddddd” ]apt-get install php5 php5-mhash php5-mcrypt php5-curl php5-cli php5-mysql php5-gd php5-intl php5-xsl -y[/dropshadowbox]
You can refer the below screen capture for details.
Once the installation gets over, you can verify the list of PHP modules installed in your server by executing the following command.
[dropshadowbox align=”none” effect=”lifted-both” width=”auto” height=”” background_color=”#ffffff” border_width=”1″ border_color=”#dddddd” ]php -m[/dropshadowbox]
This is the step by step method of installing LAMP in your debian based servers. We will see the installation of LAMP on CENTOS/Redhat based machines in our upcoming posts.


